LaserTag
I have been thinking for a while about building a lasertag game, and have finally made significant progress on doing so.
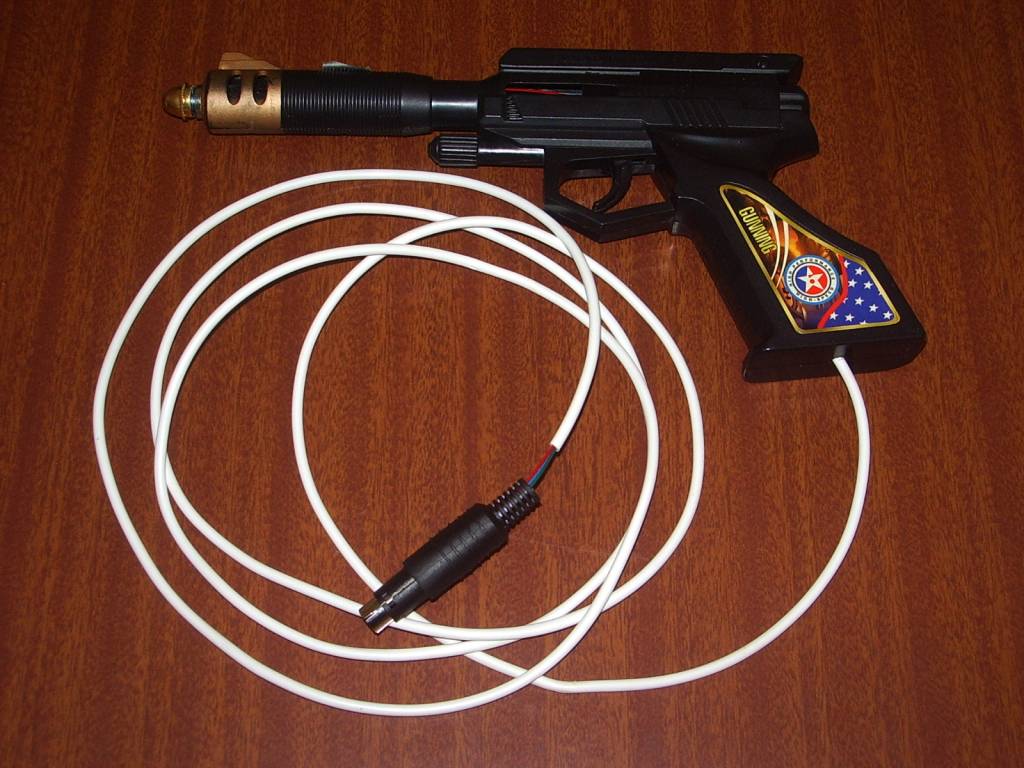
I took apart a toy gun from the $2 shop, and added the laser diode from a laser pointer (also from the $2 shop) and a microswitch connected to the trigger, along with an appropriate cable.
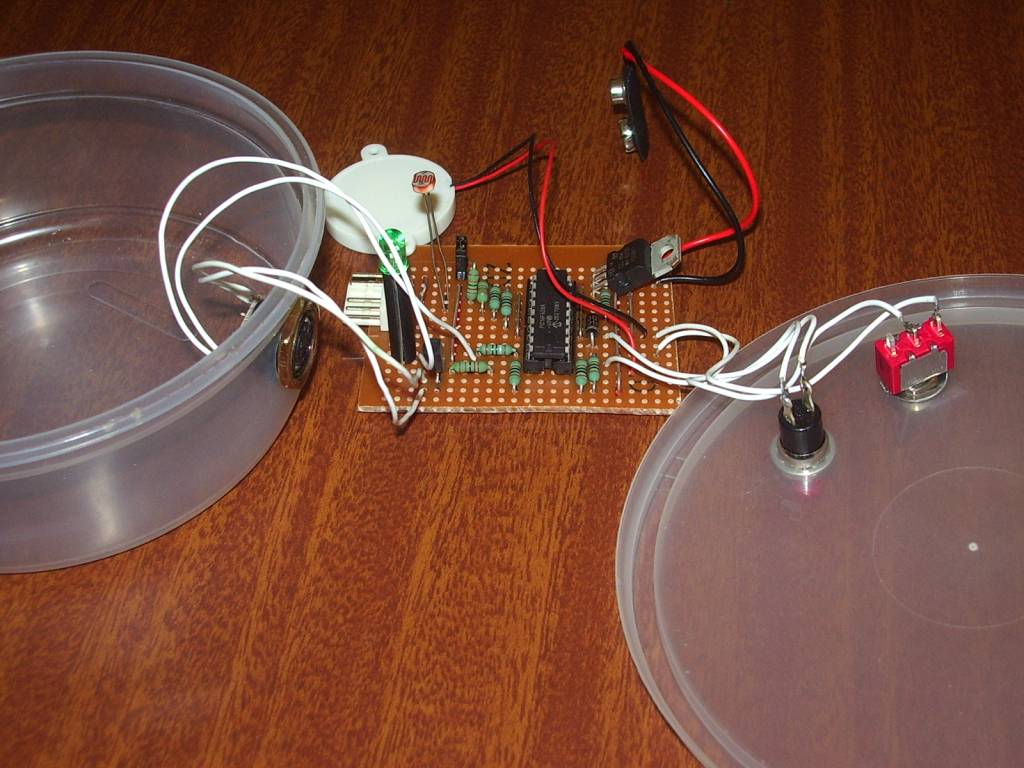
The electronic design is based around a PIC16F628A microcontroller. The following photos show the prototype on a breadboard:
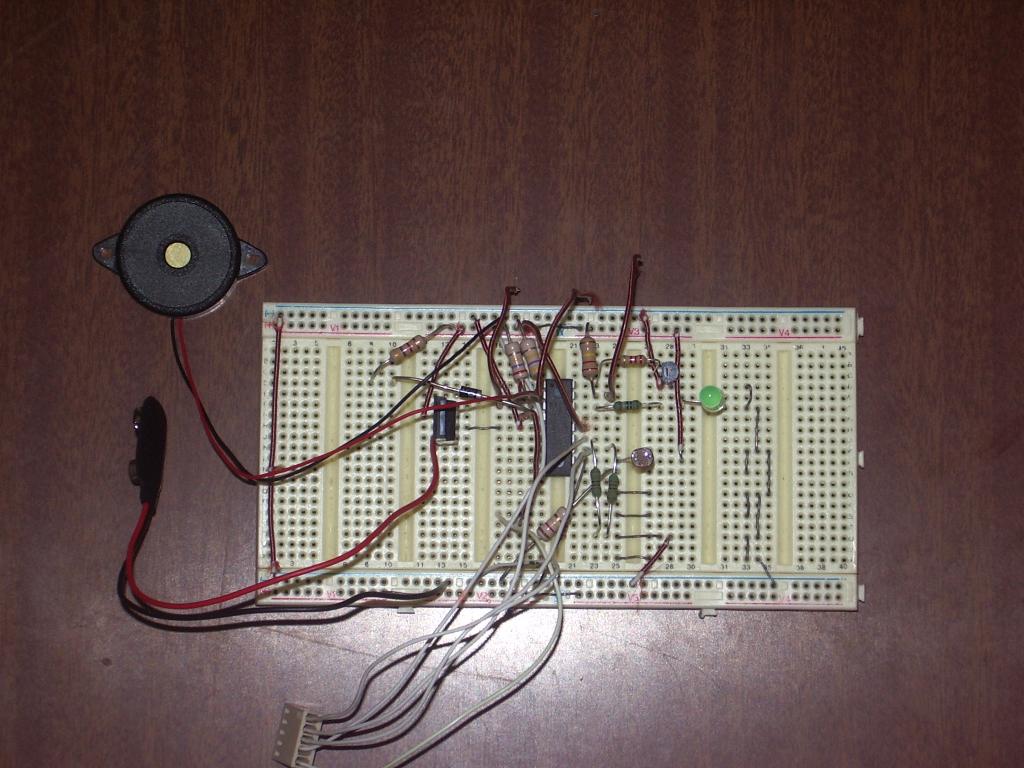
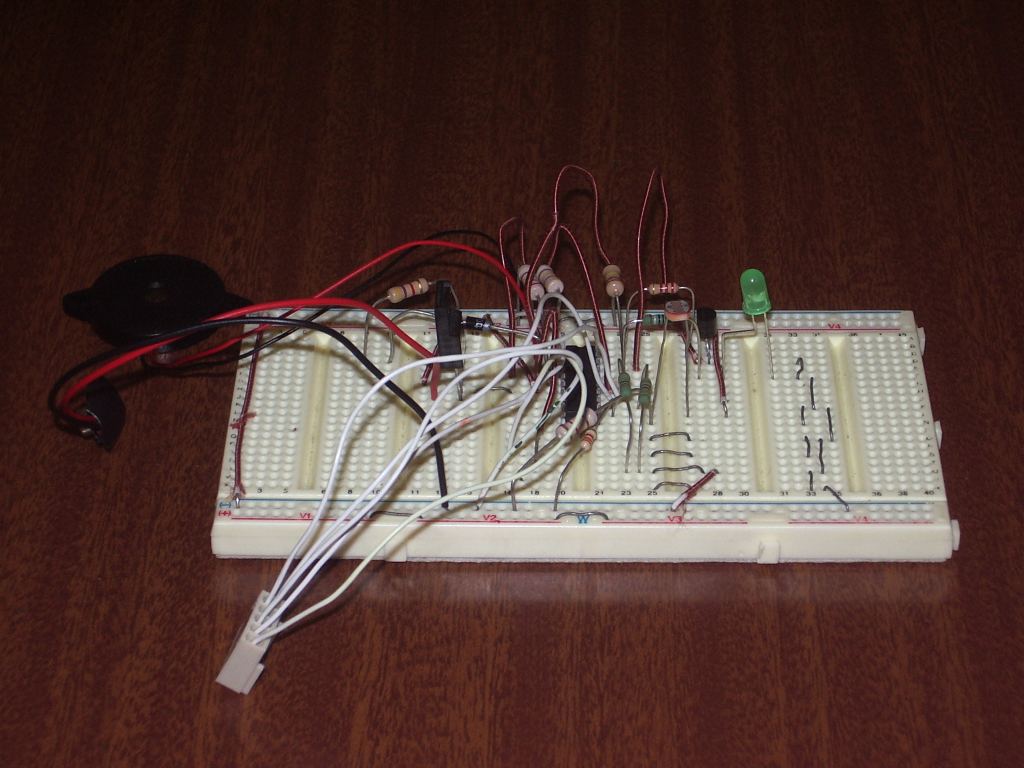
The 18 pin DIP IC in the middle is the PIC16F628A. The 3 pin IC on the left is a 5V voltage regulator. The circular black device is a piezo transducer, used for producing various beeps. The 5 pin header plug at the bottom of the pictures is for connection to a programmer for in-circuit programming.
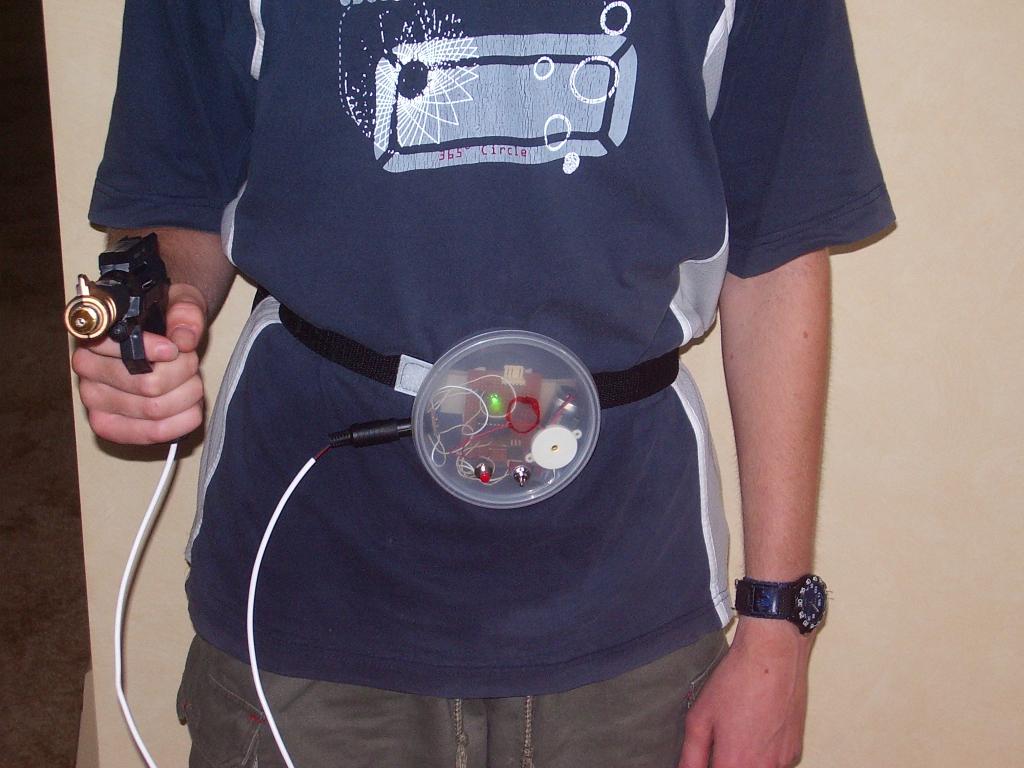
Once I had finalised the electronic design, I bought more parts from Jaycar and DSE and built the first unit on stripboard, as pictured below:
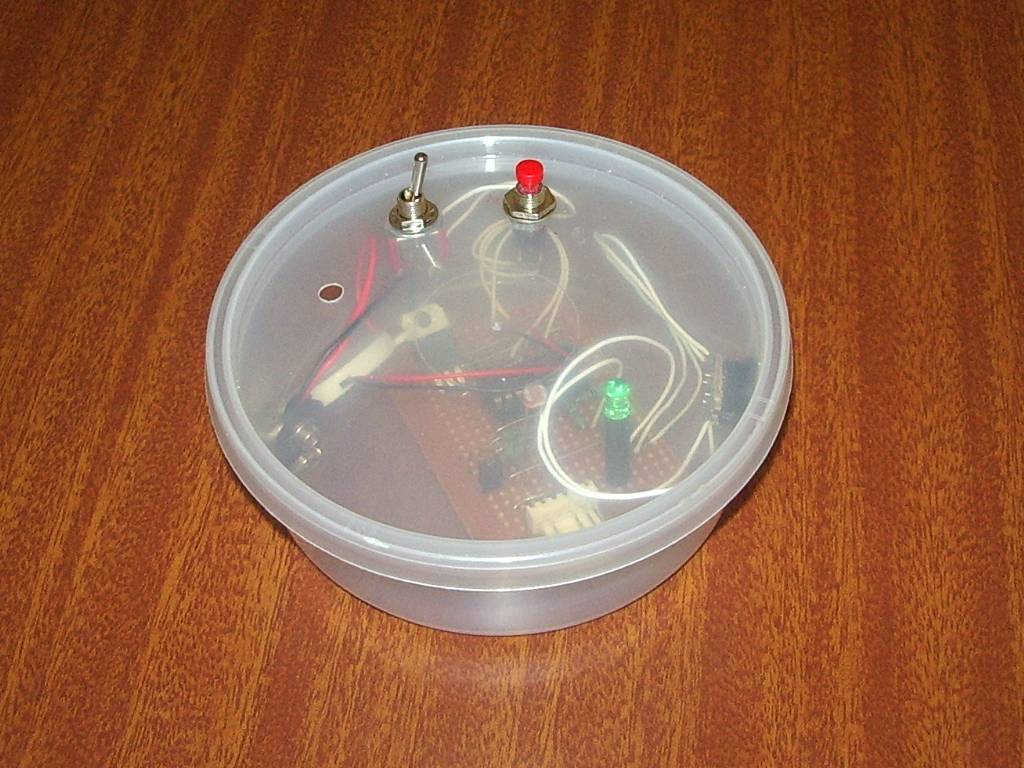
The 4 pin DIN socket on the case is for attachment of the gun. The button is to reload, and the toggle switch to change weapon. The empty hole in the lid is for the piezo transducer, not yet attached at this point.
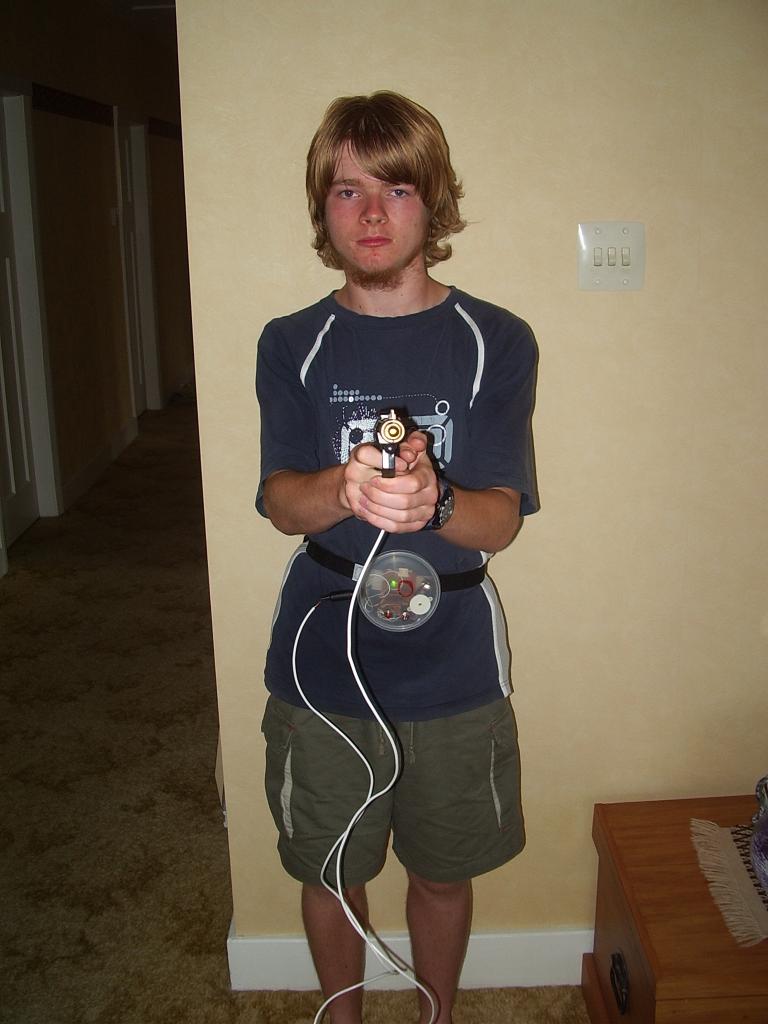
Here you see the system in action, being modelled by my brother Timothy:
Recently, I helped my young cousin Thomas to construct a gun for himself. This gun — pictured below — was made from a piece of bamboo and part of a plastic vacuum-cleaner pipe.

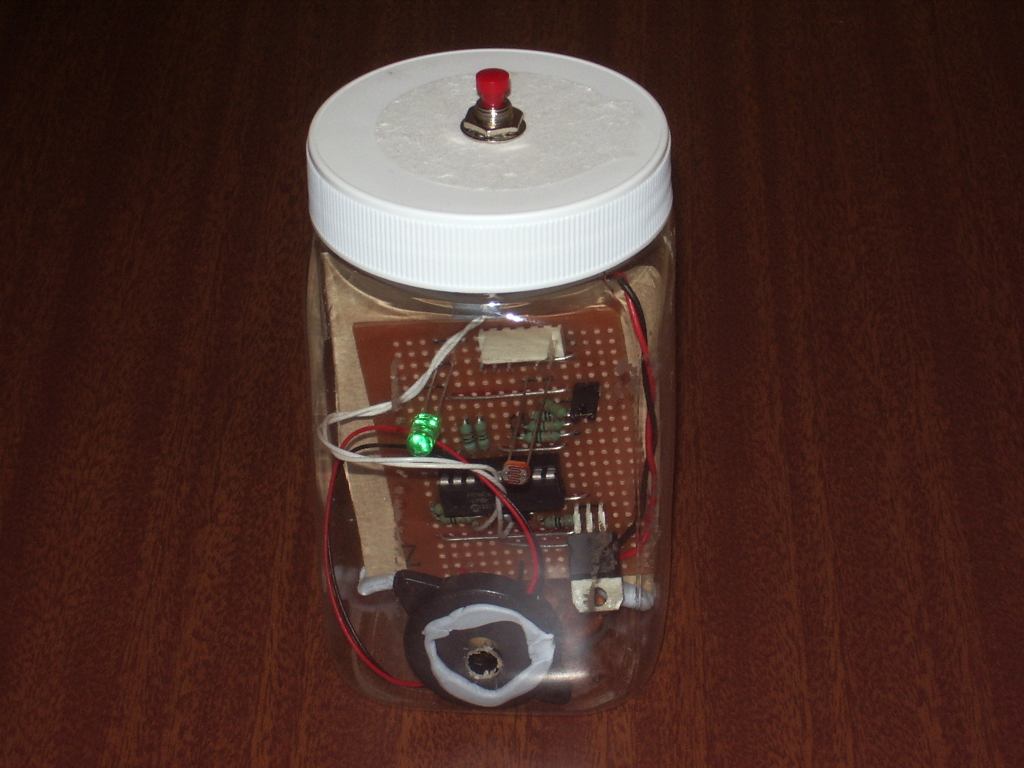
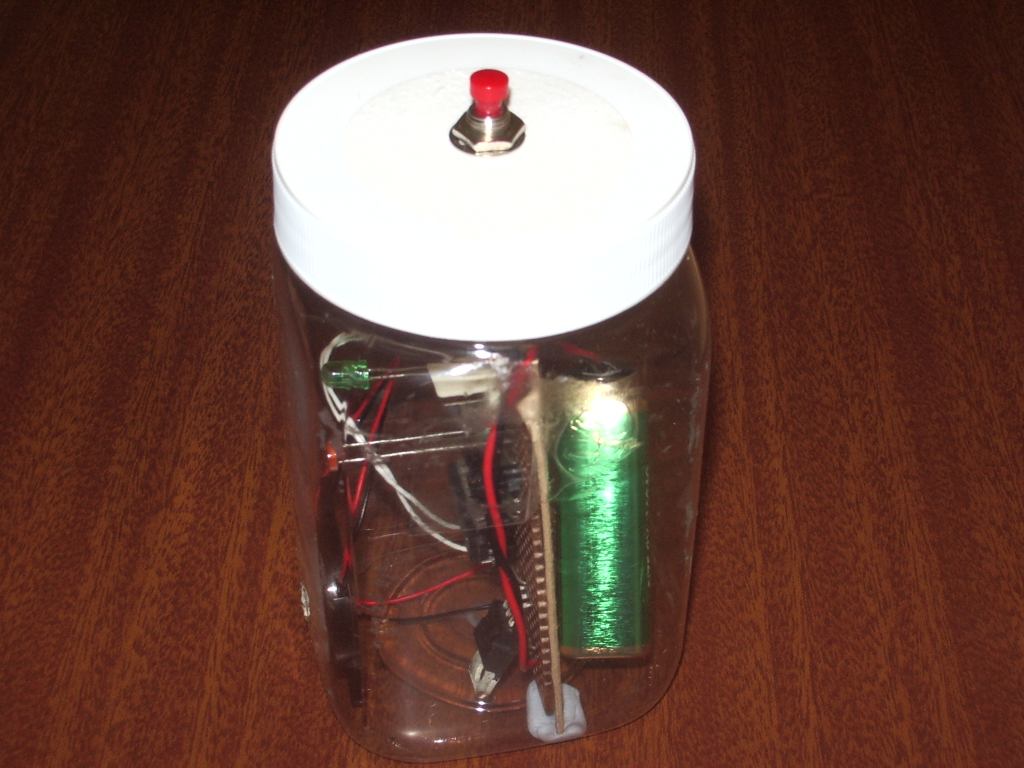
The first container I used was a bad shape and too soft (which made it too easy to break), so I found a better container, as pictured below.

I have also built a target (pictured below), which has a similar circuit but without the gun, toggle switch or ammo LED and which runs a different program. This is intended to sit at a team base and be shot by the opposing team. After each hit it beeps and the life LED turns off for a short time; after the 10th hit a lower beep is produced and the life LED stays off, indicating that it is disabled. The button on top will reset it.
You can find the source code to program the microcontrollers, and some more photos and hand-drawn circuit diagrams here. Source is licenced under the GNU GPL 3.0. lasertag.asm is for the device that the players wear, while target.asm is for a stationary target that can be shot. It is a fairly simple design, no communication or codes in the laser, just a simple light threshold. The PIC16F628A microcontroller I used is a bit dated now, and if I were designing it again now (2014) I would probably use one of the AVR microcontrollers, which would require some changes to the circuit and of course rewriting the firmware.
Parts list
Items in bold are recommended, for price or design.
The following parts are required to build the main unit. Also needed is a gun.
Revised 2-2-2006: more sensitive and added ammo. indicator LED.
| Part | Quantity | Catalogue number & price | |
|---|---|---|---|
| DSE | Jaycar | ||
| Stripboard | H5112 / $8.94 (this is much bigger than needed, enough to make about 8 units) |
||
| Electronics solder ~0.6mm diameter | |||
| Tinned copper wire ~0.7mm diameter | 6 links | W3015 / $9.93 (100g / 27 metres) | WW4032 / $10.95 (25g) |
| Light hook-up wire | 6 lengths | ||
| 180Ω resistor | R0161 / $0.28 (pack of 5) | ||
| 2.2kΩ resistor | 1 | R0187 / $0.28 (pack of 5) | |
| 10kΩ resistor | R0203 / $0.28 (pack of 5) | ||
| 120kΩ resistor | 1 | R0229 / $0.28 (pack of 5) | |
| 300kΩ resistor | 5 | R0238 / $0.28 (pack of 5) | |
| 1N5817 (or similar) Schottky diode | 1 | Z3250 / $0.98 | ? |
| 18 pin dual wipe IC socket | 1 | P4180 / $0.54 | PI6503 / $0.56 |
| 6 pin 2.54mm spacing header socket | 1 | HM3426 / $0.55 HM3416 / $0.36 |
|
| Header strip * | 2 pin | P2726 / $1.48 (25 pin) | HM3211 / $0.65 (28 pin) |
| BC548 transistor | 1 | Z1308 / $0.32 | ZT2154 / $0.33 |
| LM7805CT/LM340T5 5V 1A regulator | 1 | Z6545 / $1.48 | ZV1505 / $1.50 |
| 5mm green LED | 1 | Z4087 / $0.28 | ZD0170 / $0.30 |
| 5mm red LED | 1 | Z4085 / $0.28 | ZD0150 / $0.30 |
| LDR | 1 | Z4801 / $2.48 | |
| Piezo transducer | 1 | L7022 / $4.66 | AB3440 / $4.45 |
| 4 pin mini-DIN socket | 1 | P1500 / $1.98 | PS0376 / $3.10 |
| Jumper shunt * | 1 | P2730 / $1.48 (pack of 5) | HM3240 / $2.20 (pack of 10) |
| PIC16F628A microcontroller | 1 | Z9190 / $5.24 | ZZ8520 / $11.95 |
| 9V battery clip | 1 | S6100 / $0.56 | PH9230 / $0.56 |
| toggle switch | 1 | P7670 / $2.24 P7668 / $2.24 |
ST0335 / $3.00 ST0570 / $2.25 |
| normally open push-button | 1 | P7560 or P9768 or P9750 / $1.48 | SP0710 or SP0711 / $1.50 |
(*): These can be left out if the design is altered slightly — it just makes programming slightly fiddly.
Some sort of case is also required — a hard, rectangular plastic box with transparent / translucent top is probably best. A bezel for the LED may be necessary, depending on the case design. The LDR may be mounted on the circuit board just beneath a translucent window in the case, or mounted directly on the case with wires to the circuit board.
The following parts are required for the gun:
| Part | Catalogue number & price | |
|---|---|---|
| DSE | Jaycar | |
| 4 pin mini-DIN plug | P1482 / $2.38 | PP0364 / $2.40 |
| Laser diode | Disassemble laser pointer from $2 shop. | |
| Trigger button | Use push button as above, or microswitch connected to trigger. | |
| 4 conductor cable | W2121 / $0.74/m W2128 / $0.88/m |
WB1620 / $0.75/m |
| Gun casing | Modify toy gun (e.g. from $2 shop), or build from plastic pipe, bamboo etc.. | |